I just wanted to
touch base to give you some additional information regarding the end of the semester.
Realizing that this will be your first formal final in the department there are a few things that you need to
know. First, the studio needs to be
cleaned before the final review. This requires all of you to clean up the studio, store and lock all of your personal
effects in your drawers and clean all
around your bench. No personal items should be left on, under, on top of or around your bench space. We will have
winter-session classes in the sophomore
space and you wouldn’t want to leave anything behind. Second, you need to do all of your “chores” and then some. As the
metalsmithing class you are required to
re-finish tools. This Thursday Brian will do a short demo on resurfacing stakes and will assign you tools to
refinish. We normally place them on your
bench (more on that Thursday). Thursday is a reading day but I
will come in and help everyone. I will also do a
patina demo and return all of your work.
Returning work will give you all some time to make any last minute adjustments before the review if needed.
For the review:
All work should be
presented on boards. I suggest 24” x 36” foam core or matte board. All work should fit on
your board. We have limited space and we will need to shuffle between groups of students. Each student will have between
15-20 min. You will be emailed a critique
etiquette document by the department that
will outline our expectations.
For the final review you should have the following:
Sketch book
Fifty pages of content
One page that has content on two sides counts as two pages.
If you have content from two classes, please make sure the
content for my class is clearly labeled. I also suggest
numbering the pages. I would like to collect your sketchbooks early so I can
return them to you before you leave for the break.
Serving utensil project
Piece should be finished and presented as such
Lacquer, paint and patina should be dry at the time of critique
Color photographs can be presented if it provides framing OR
is required to relay content
(example: Serving
food that cannot be served at the critique OR staging that cannot be shown)
Nesting bowl project
Piece should be finished and presented as such
You should have three bowls
Lacquer, paint and patina should be dry at the time of critique
Color photographs can be presented if it provides framing OR
is required to relay content
(example: Serving
food that cannot be served at the critique OR staging that cannot be shown)
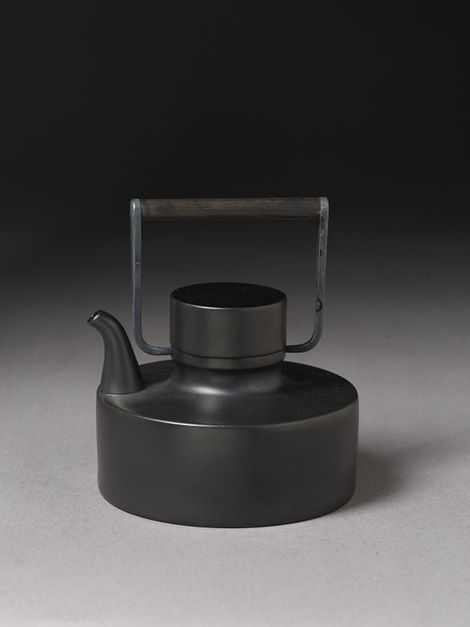
Raise a glass (raising
project)
Piece should be finished and presented as such
Your piece should have a rim, spout of foot
Lacquer, paint and patina should be dry at the time of critique
Color photographs can be presented if it provides framing OR
is required to relay content
(example: Serving
food that cannot be served at the critique OR staging that cannot be shown)
Samples
Two chasing tools (one matting tool made with the checking
file)
One hydraulic pressing
One small spoon forged from provided copper bar
Sample bowl.