For the midterm you will need:
1. Presentation board
2. Finished work (Demo Spoon and finished serving utensil)
3. Sketchbook
PROJECT #2
Vessels Vessels Vessels/Nesting bowls
Project description:
Using 18 gauge copper or brass sheet sink three bowls to create a set of nesting bowls.
Project description:
Using 18 gauge copper you are to sink and plannish three (or more) bowls. All three bowls must have separate surface finishes. One bowl must remain perfectly plannished. The bowls must fit with each other to become a set. Prior to starting each disc should not be bigger than 6” in diameter. To make the bowls fit each disc must be concentrically smaller before starting
Step one: Do research
Form over function? Visit the silver collection in the museum.
What are metal bowls used for? Why do they have to be metal?
One design element can be carried over to all three bowls that help make them a set?
Do they all need to be made out of the same metal?
Is there a pierced component?
Step two: make models/finalize design decisions
Sketch/cut profiles
Dedicate at least four pages in your sketchbooks.
Step three: finalize and execute
Pieces should have a final finish at the time of the crit (no wet lacquer or excessive polish! and NO PLATING)


With sinking we are really stretching the material not forging it (that will come later). I started using the teardrop mallet after I used the sinking hammer. You will need to use a steel hammer to stretch the material. The teardrop is more for forming/truing up than stretching. The closer in shape your hammer head is to your final shape the easier it will be to "smith" your shape. After every round be sure to flatten out any wrinkles on the flat portion of a stump or on the anvil.
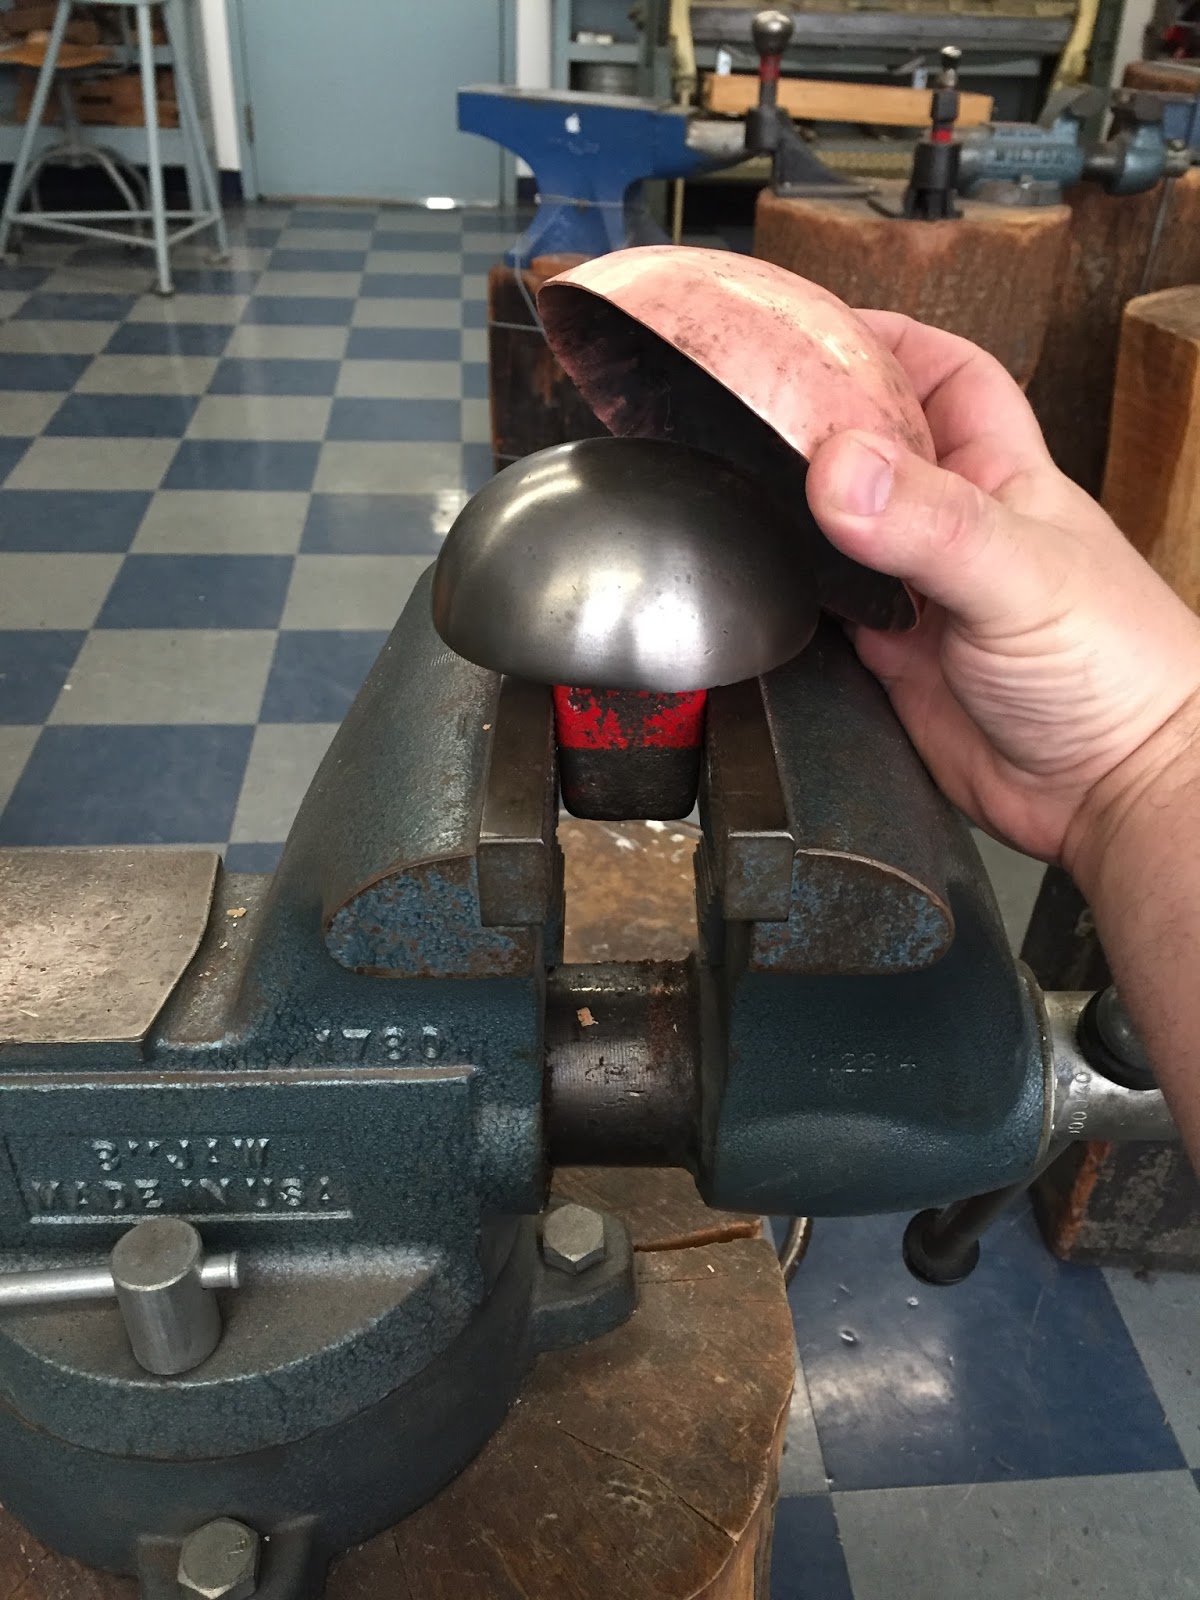
I started using the stump with the bowl carved into it and quickly discovered that it is the wrong size for my bowl so I switched to a leather bag. Before I started I whacked it a few times with the mallet to create a bowl indent to hammer into. Make sure your center punch mark is on the outside!
Using overlapping inward spiral blows I got it to a bowl shape pretty quickly. I then annealed and did it again. The second round I tried to stretch the material more. Then I annealed again and stretched it more. I found a nice ball/mushroom stake that I could use as a hammer. The final round I put a mushroom stake into a vise and used a rawhide mallet to true up the bowl.
I also started up a plate/saucer....scroll down for more text.
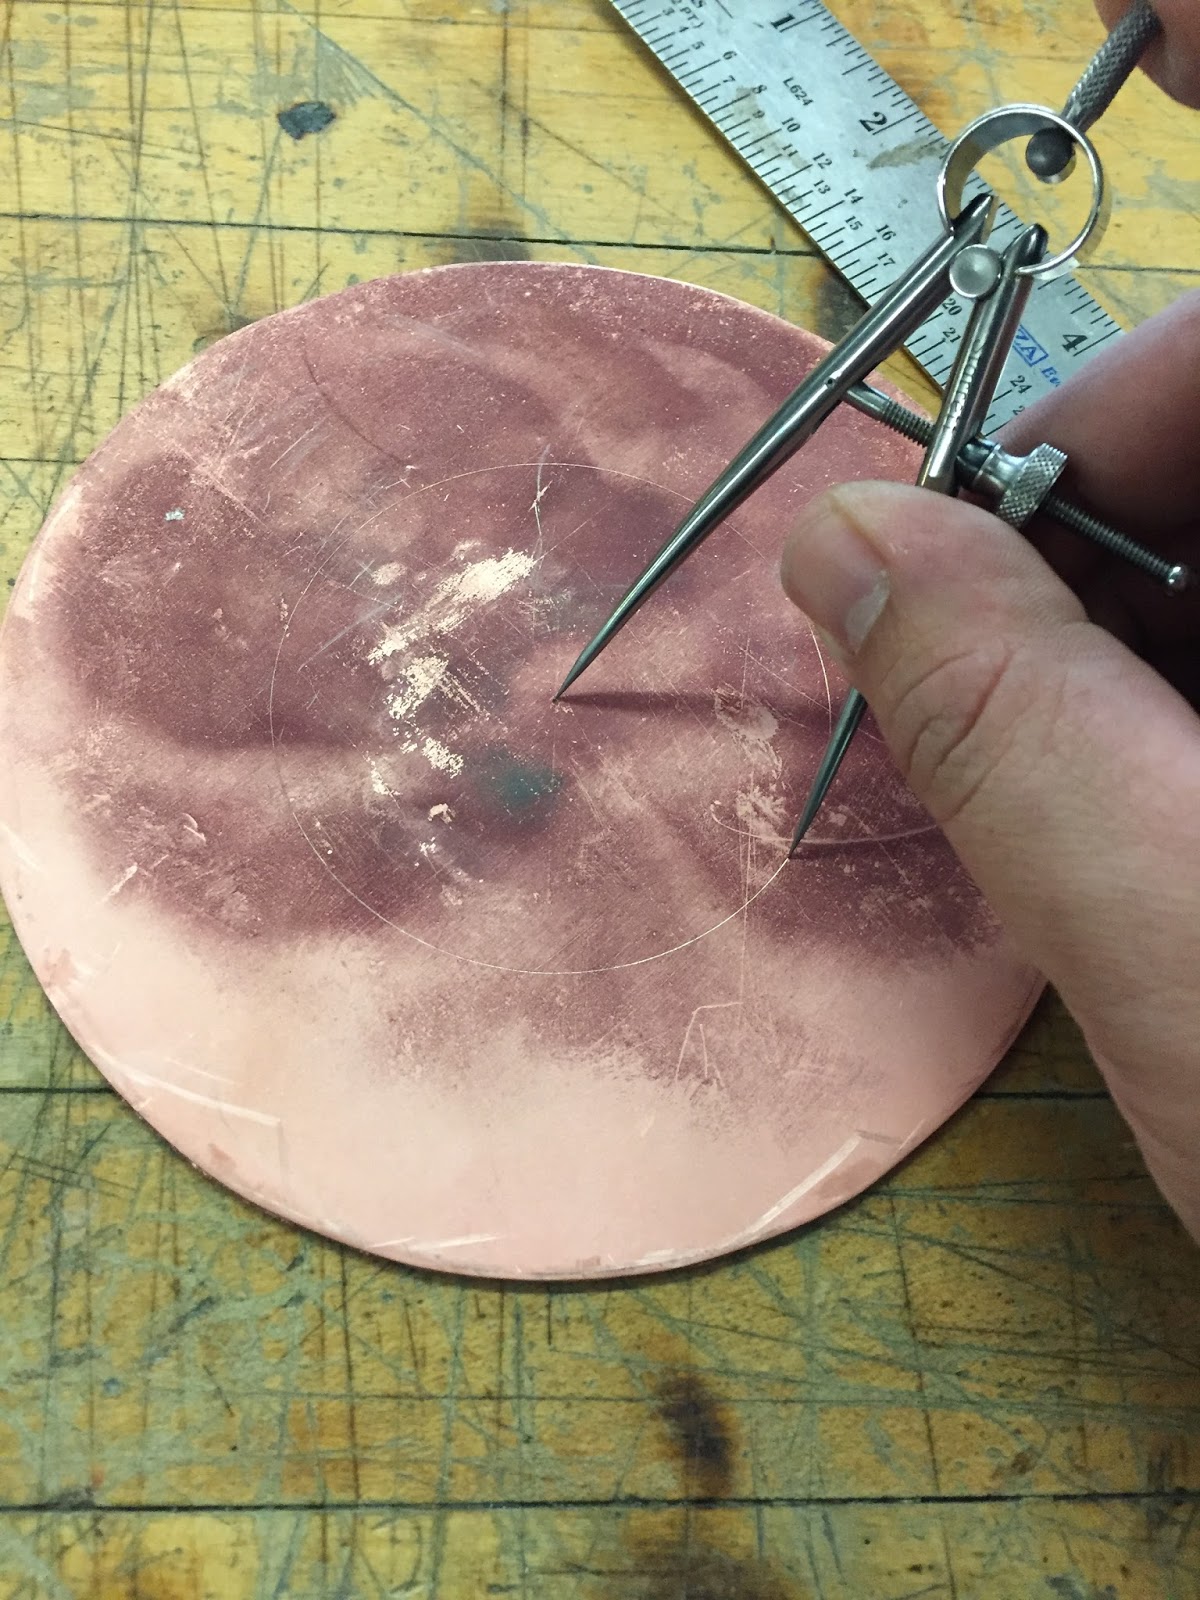
After finalizing my shape on my bowl I started working on my saucer. This shape is obtained by only hammering on certain portions of my disc. I start by marking off my disc with my divider. I picked a 3" diameter center. Using my center punch I scribed a line where the depressed portion will be. I then started very carefully sinking inside the line. After I got a slight indentation I flipped it and hammered the lip flat on the anvil, being careful not to disturb the work I had done before.
Setting my dividers I then dragged them against the edge of my disc to make a mark on the other side. These scribe lines are only a guide and shouldn't be too deep. I don't want them to appear on my final piece but I do want them to survive the annealing process.
I then very carefully flattened the depression on the anvil.
Because I cannot see through my metal my depression became a bit wonky so I used the edge of a stump and the soft edge of the anvil to true it up. This is tricky and may require some finesse.
My edge was still a bit wonky so I decided to find some scrap wood and make my own shape. I used my dividers to cut out a 3" disc of hardwood that I will use to hammer on. I also used a hole saw to cut a hole in a piece of plywood to hammer into. I will start with this next class after our tour.